Students and classes
The Students page is your roster: the students whose papers you mark, grouped by the classes you make. AutoMarkHQ uses this roster to work out whose paper is whose, so a tidy roster means fewer papers it has to ask you about.
The Students page
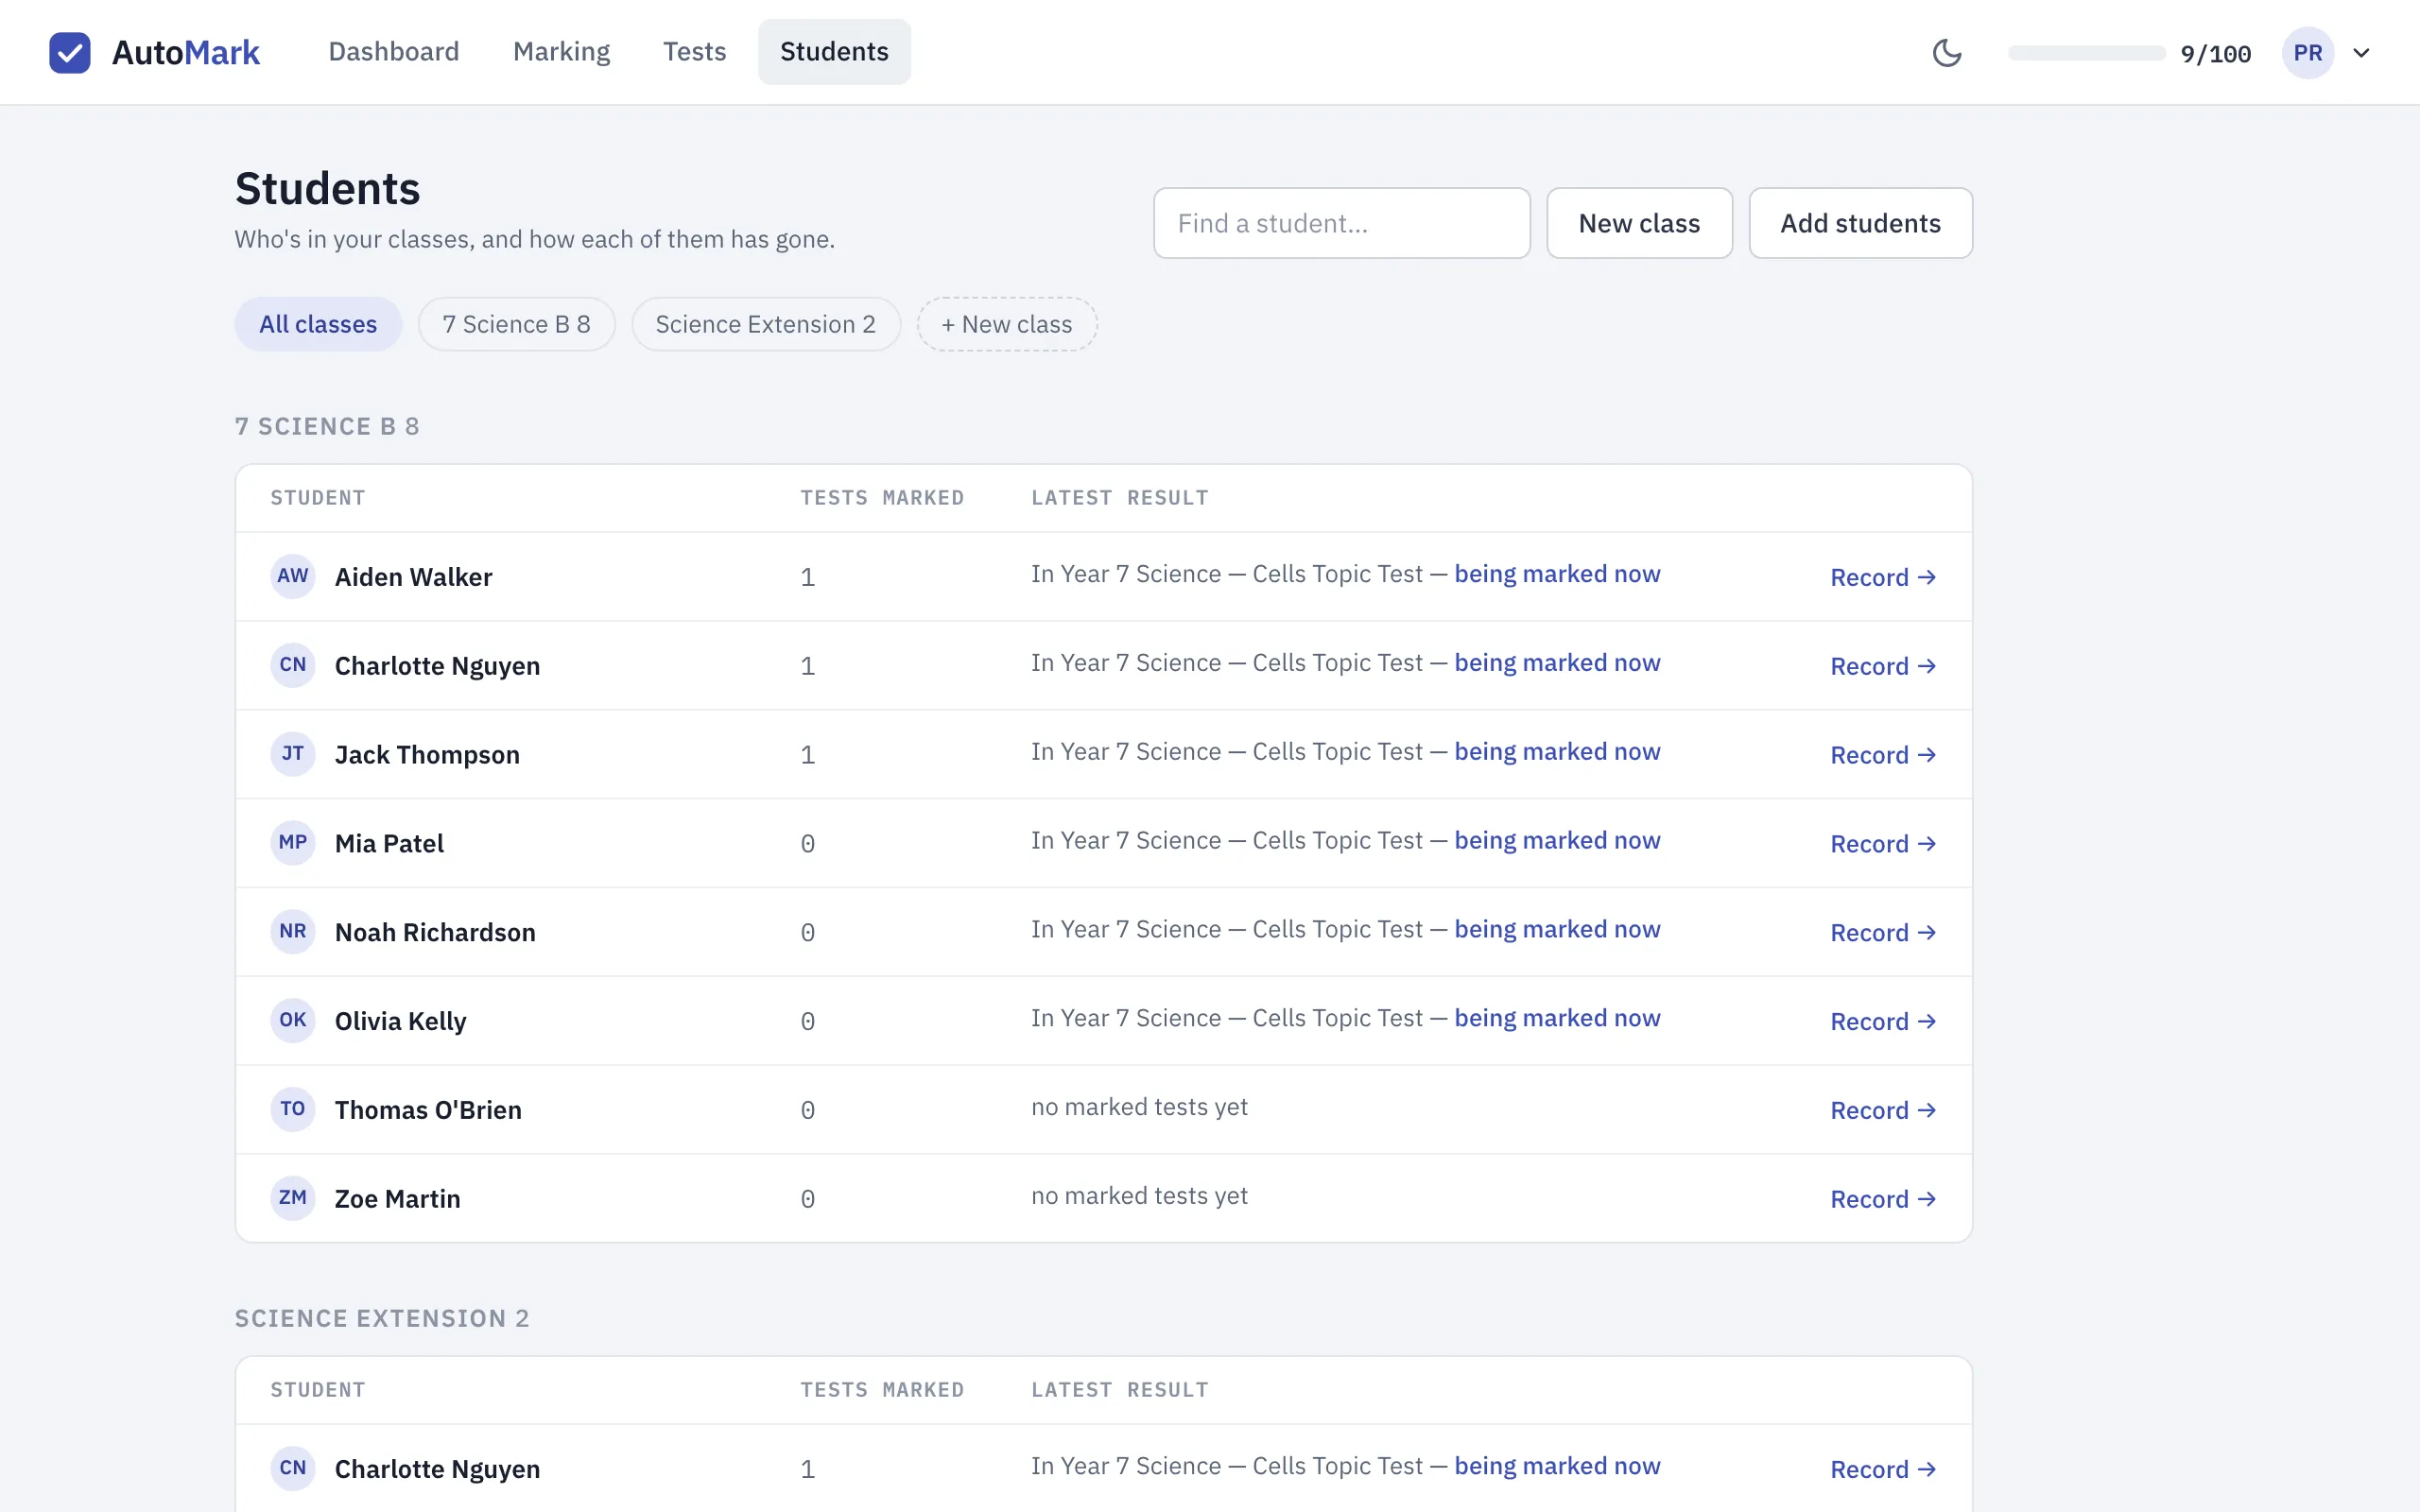
Section titled “The Students page”Each class has its own section listing its students. For each student it shows how many tests have been marked for them and their latest result. A student whose paper is still in a run you haven’t committed shows being marked now with a link into that run, not a score. Nothing is recorded against a student until you commit the run.
Use the class chips across the top to show one class at a time, or Find a student to search by name.
Classes
Section titled “Classes”Choose New class and give it a name, for example Year 7 Science. Class names are unique on your roster. If a class with that name already exists, AutoMarkHQ offers it to you instead of making a second one.
A student can be in more than one class. That covers an elective, a composite class, or a student repeating a unit alongside their usual class. Adding a student to a class doesn’t take them out of another one.
Adding students
Section titled “Adding students”Choose Add students. The panel has two modes.
- New student adds someone to the roster. Only the name is required. You can also add your own student ID or reference, notes, and tick the classes they’re in. You can make a new class from the same form.
- Existing students puts students already on your roster into a class. Pick the class, tick the students, and choose Add. Anyone already in that class isn’t listed.
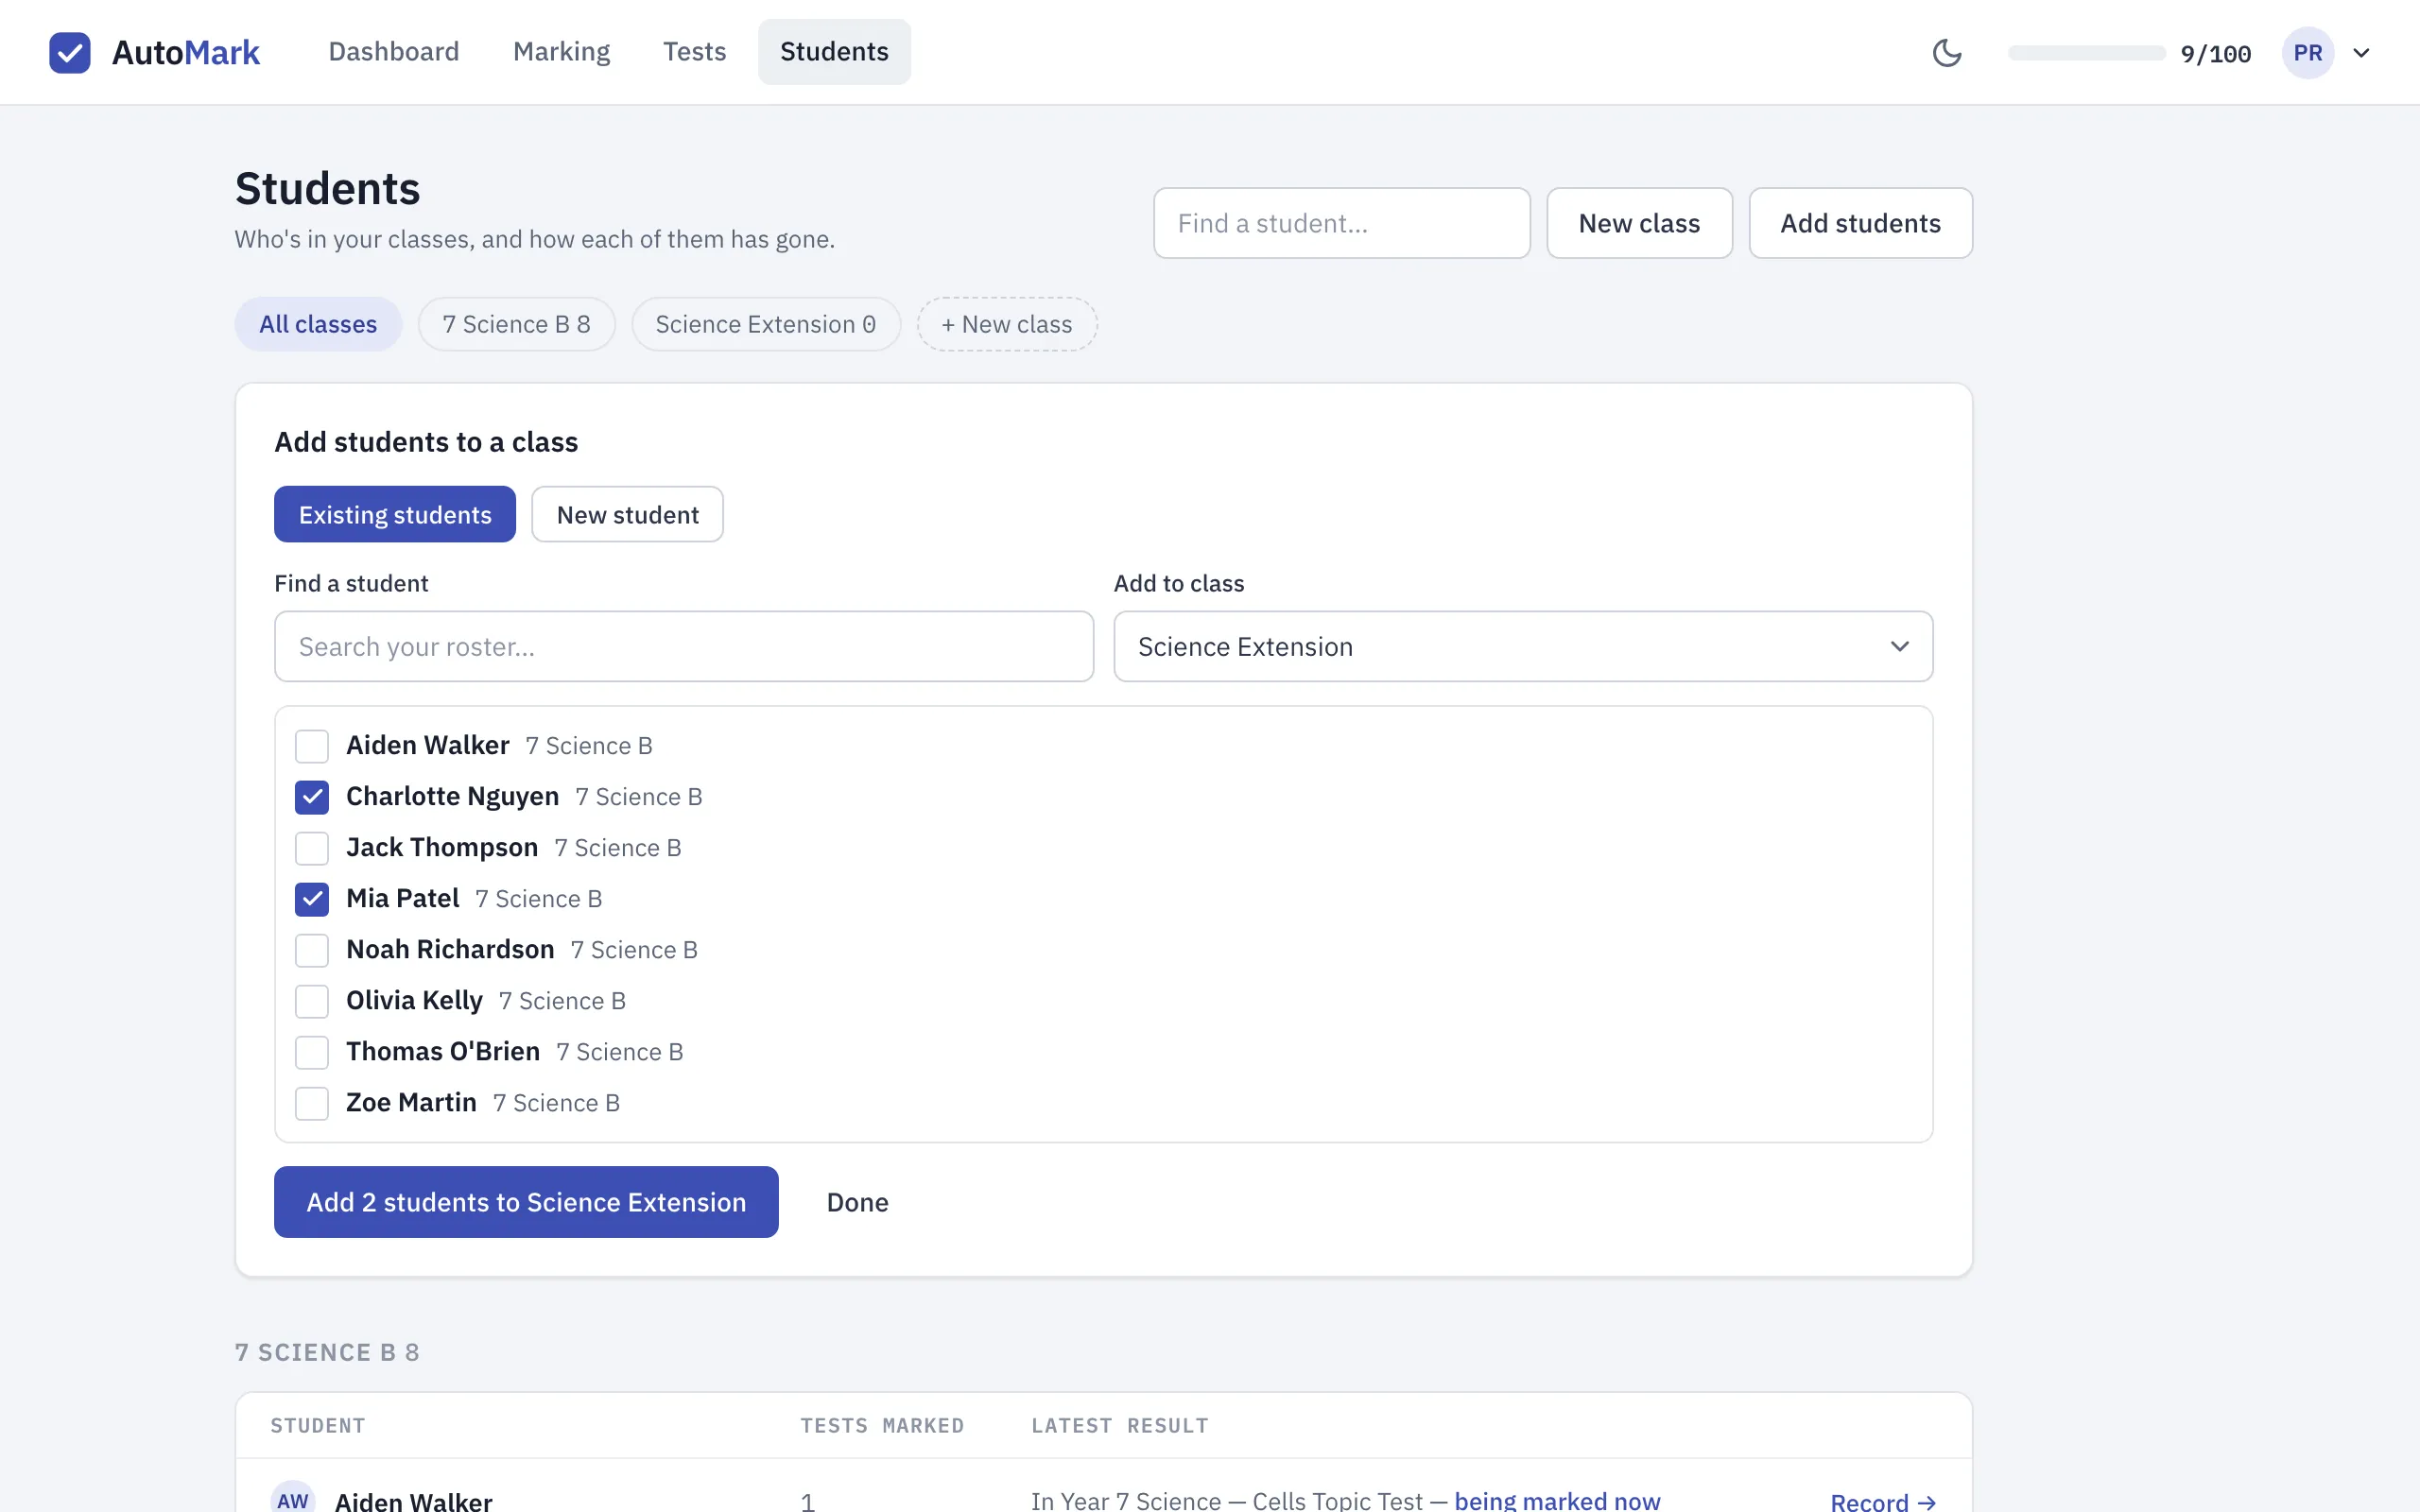
You can also add a student while you’re matching papers to students inside a marking run, when a paper belongs to someone who isn’t on the roster yet. See identifying students.
Duplicate and similar names
Section titled “Duplicate and similar names”AutoMarkHQ tidies a name as you add it. It removes stray spaces and turns Nguyen, Charlotte into Charlotte Nguyen. It keeps your capitalisation exactly as you typed it.
If the name you’re adding is the same as a student already on your roster (ignoring capitals, punctuation and the order of the names, so charlotte nguyen and Nguyen Charlotte count as the same), AutoMarkHQ stops and asks whether you really mean to add another student with that name. Choose Add anyway if you do. If the new name is very close to an existing one, it asks Did you mean…? and explains that keeping both sends their papers to you to match; choose Create anyway to keep both. When two names on your roster are nearly identical, check the student on each paper before you commit the run. Nothing is recorded against a student until you do.
A student’s record
Section titled “A student’s record”Choose Record next to a student to open their record. It shows:
- Classes: every class they’re in. Remove one with ×, or add another with Add to class….
- a note when one of their papers is in a run you haven’t committed yet, with a link to open that run;
- Marking history: each test they’ve sat, with the score once the run is committed;
- Struggled with: questions they lost marks on in recent tests, each linked to how the whole class went on that question.
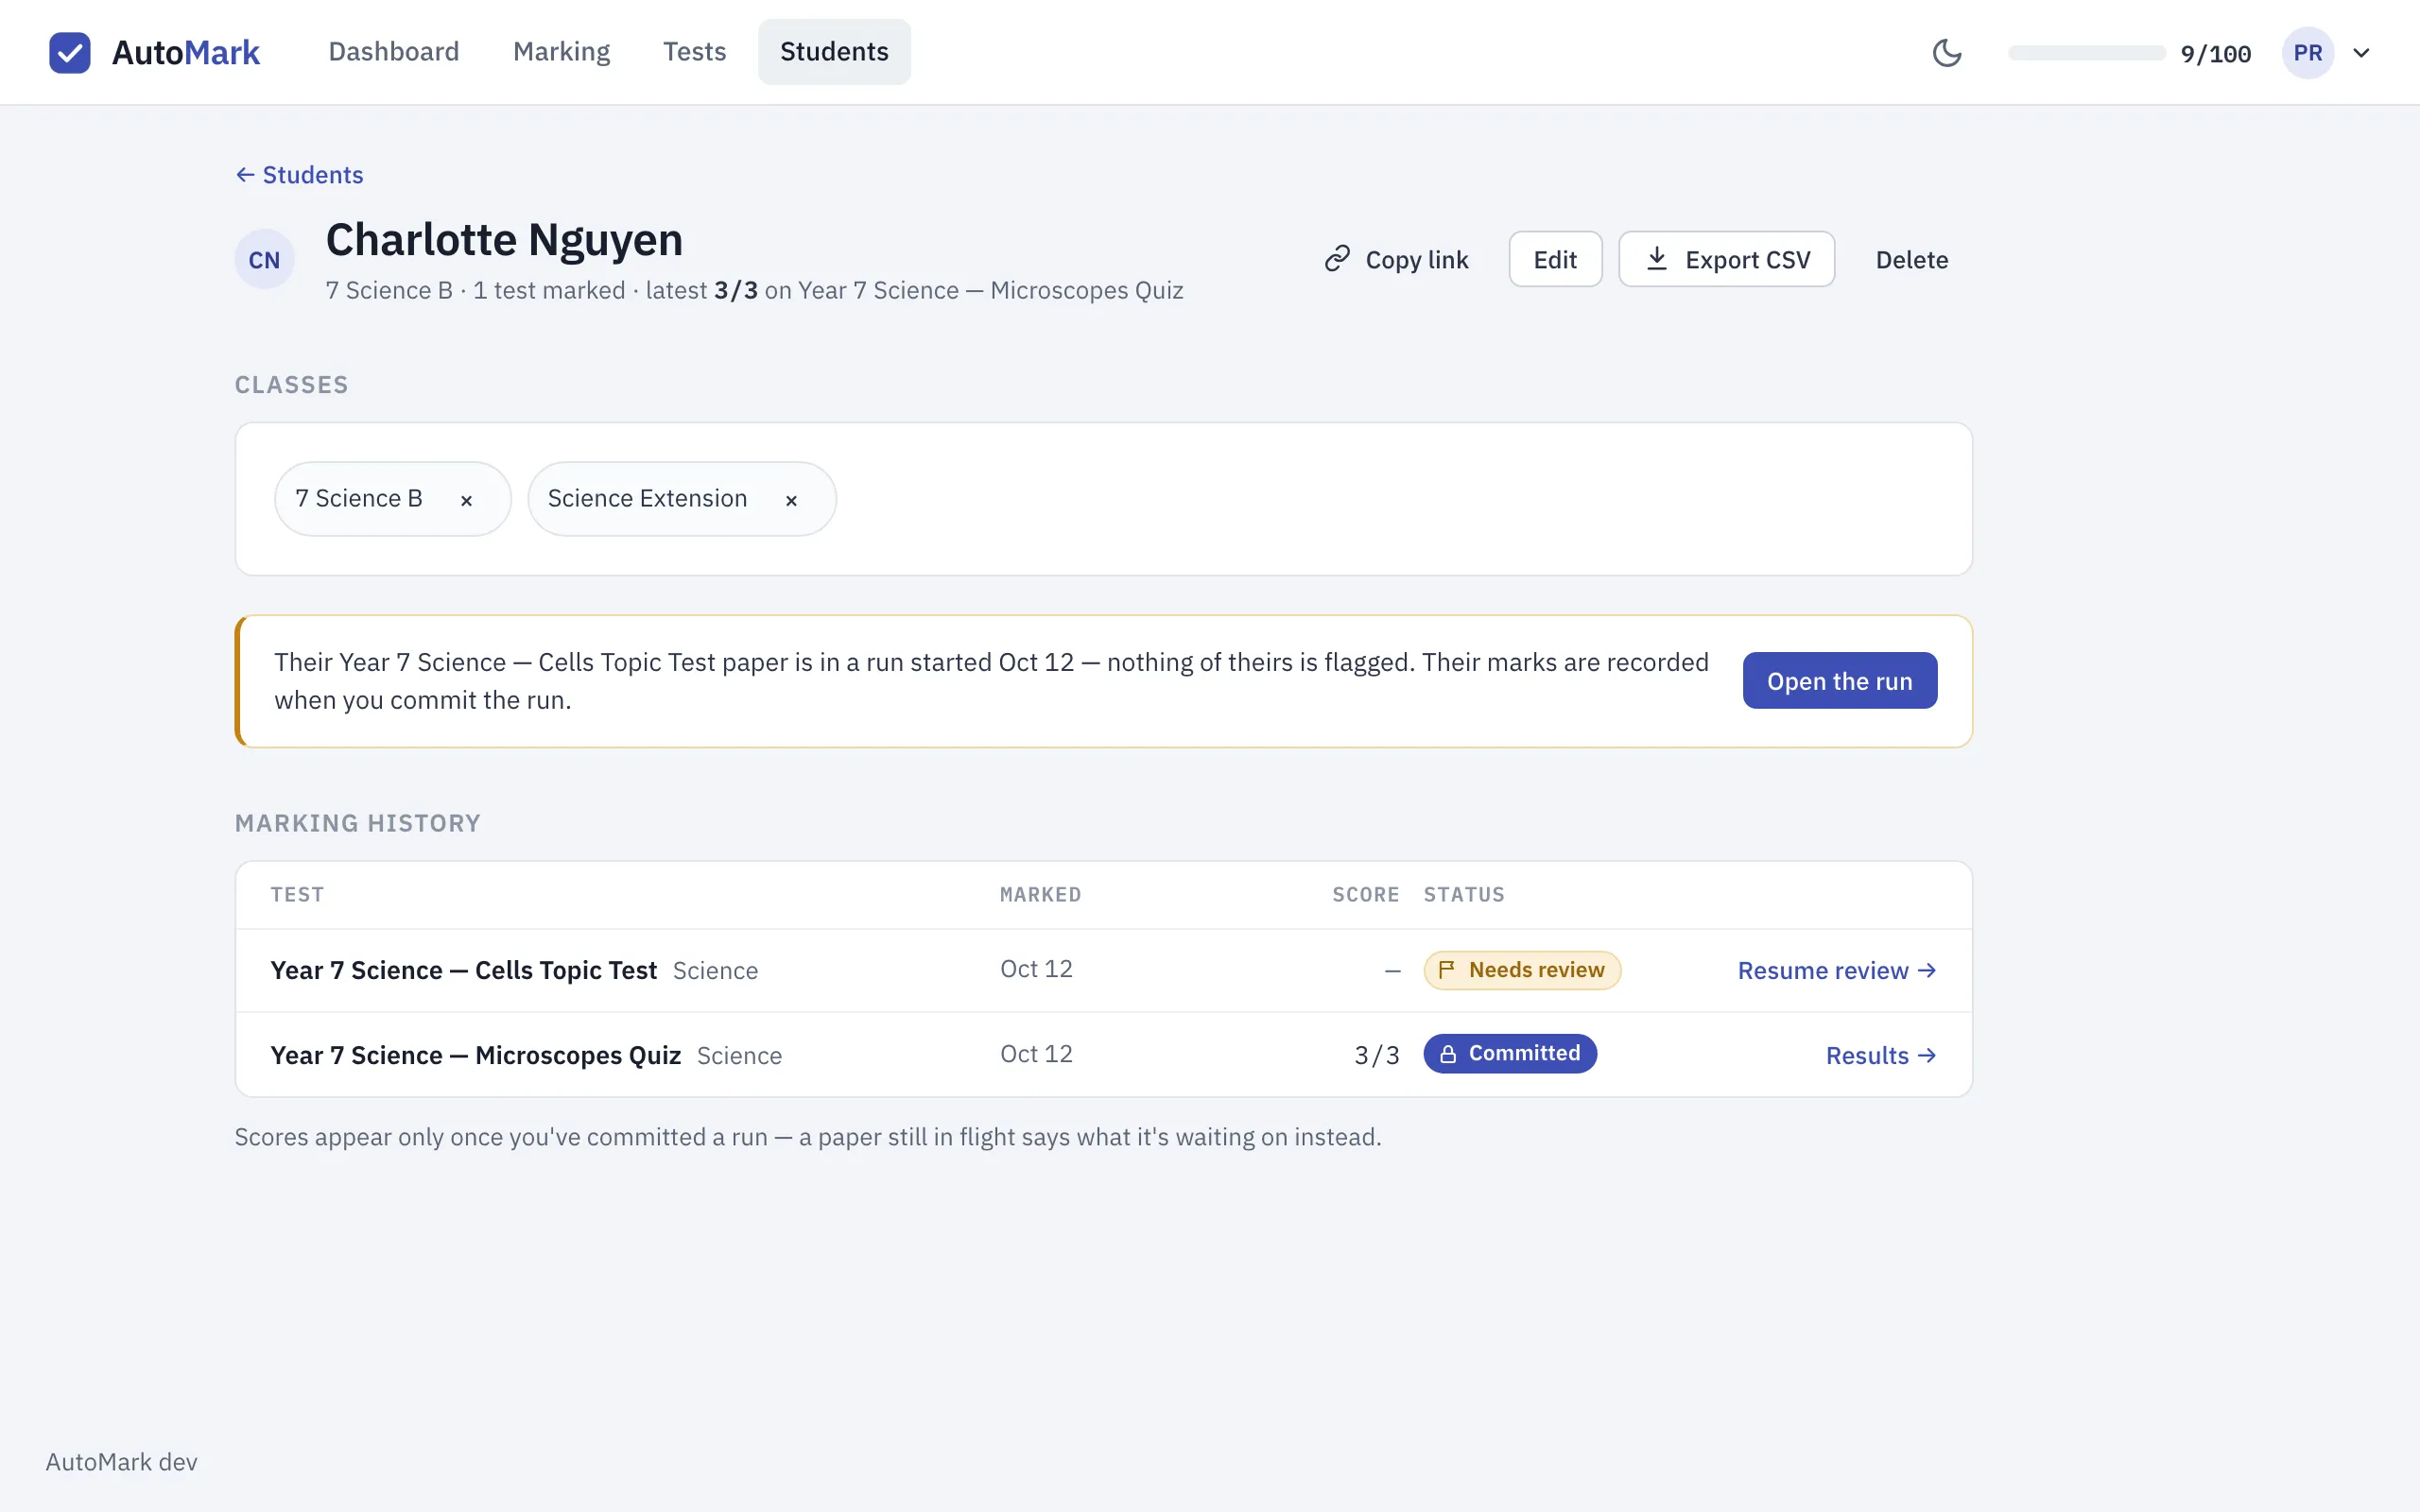
From the record you can also Edit the student’s details, Export CSV of their committed results, or Delete them. Deleting removes the student from your roster permanently. Their marked results stay, but are no longer linked to a named student. The confirmation explains what is kept before you decide. To understand how your account’s data is handled, see the privacy policy.
For reading results and exporting them to your markbook, see students and records.