Label-a-diagram questions
A label-a-diagram question prints your picture with numbered lines underneath it. Students write the name of each numbered part on the matching line. AutoMarkHQ reads and marks each label as a separate short answer, so a student who gets two of three labels right earns the marks for those two.
Students write the labels. They don’t draw on the picture or point at it, and AutoMarkHQ reads only what’s written on the numbered lines.
Start with the right picture
Section titled “Start with the right picture”Your picture needs its own numbered pointers: a 1, 2, 3 beside each part, with a line to that part. Most worksheet diagrams already come this way. AutoMarkHQ does not add numbers to your picture, so a picture without them leaves students guessing which line belongs to which part.
Save it as a PNG or JPEG under 5 MB.
Turn a question into a diagram
Section titled “Turn a question into a diagram”- Write the question as usual, for example Label the numbered parts of the plant cell.
- In the question’s Type menu, choose Label a diagram.
- Read the short explanation and choose Choose an image… to pick your picture.
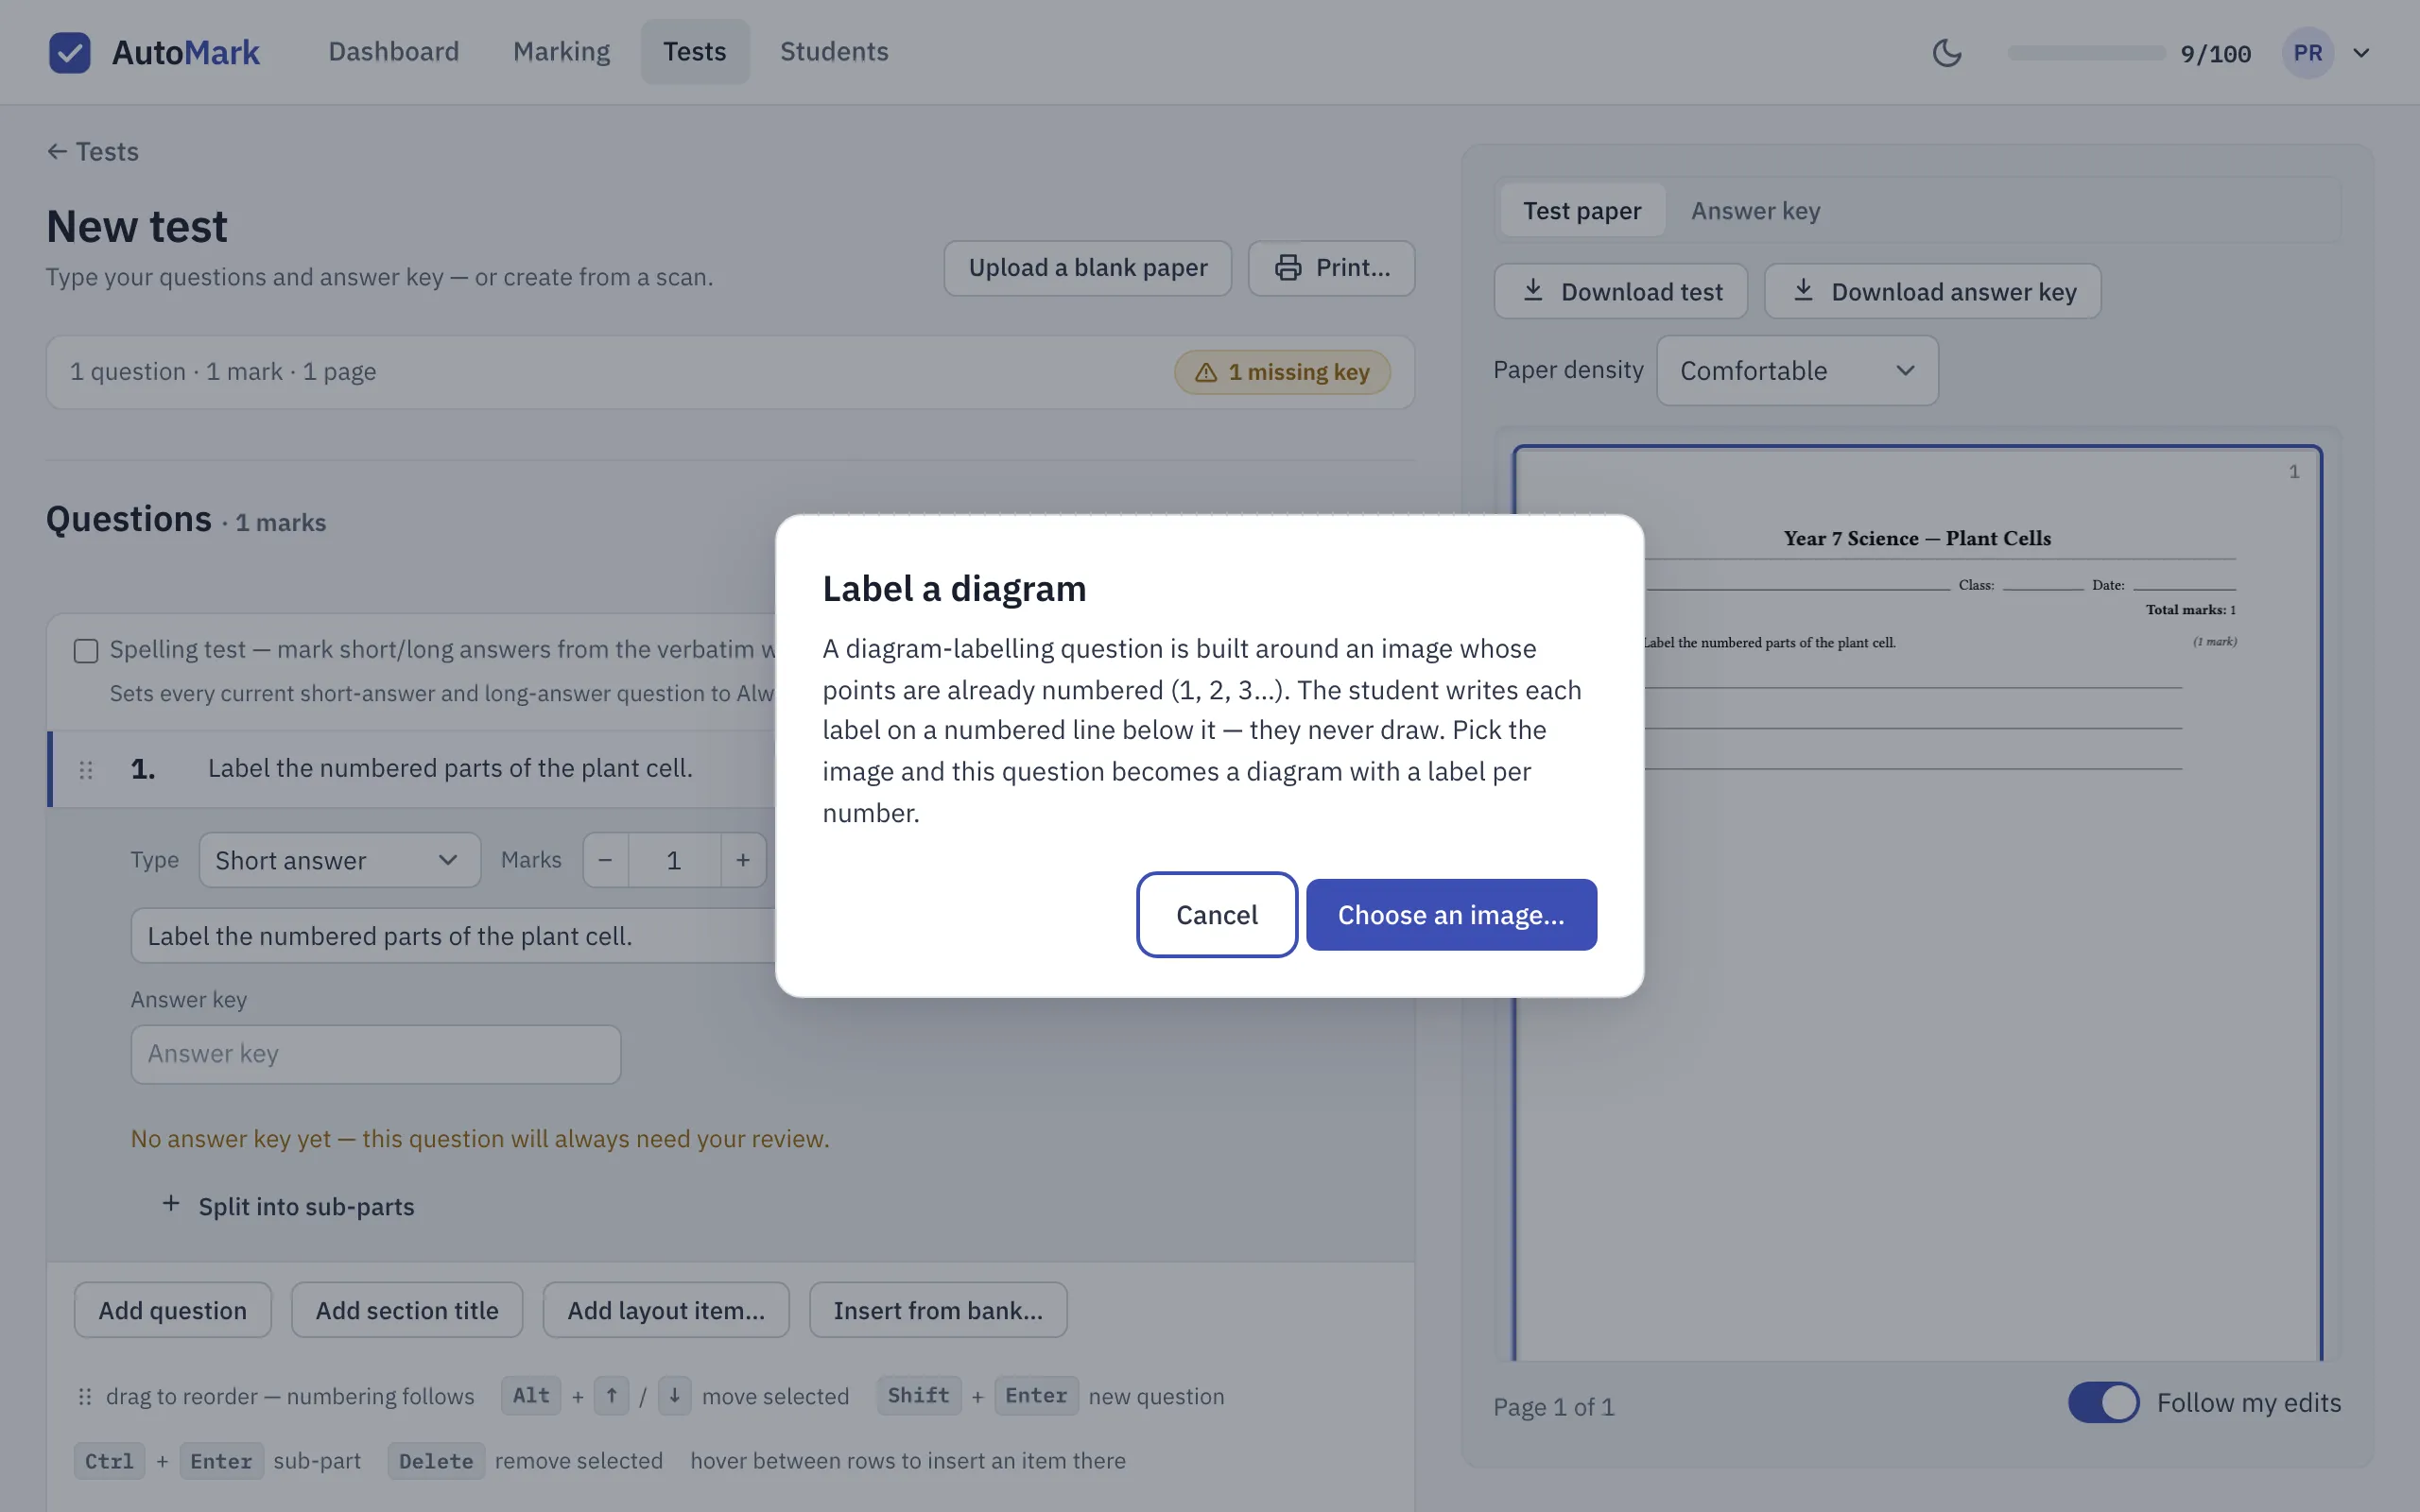
Nothing changes until the picture has uploaded. Then, as the dialog says, the question becomes “a diagram with two labels to start — add a label for each number on your image.” If the question already had an answer typed in, the dialog warns you that it will be cleared, because a diagram has one answer per label.
Label a diagram is available on a whole question, not on a part of a multi-part question.
Set up the labels
Section titled “Set up the labels”Each label is a row under the picture. Give each one:
- the answer you expect, such as nucleus;
- the marks it’s worth (one each to start with);
- optionally a short prompt. It prints beside the line.
Use Add label until there is one label for every number on your picture. Keep them in the same order as the numbers. A diagram needs at least two labels.
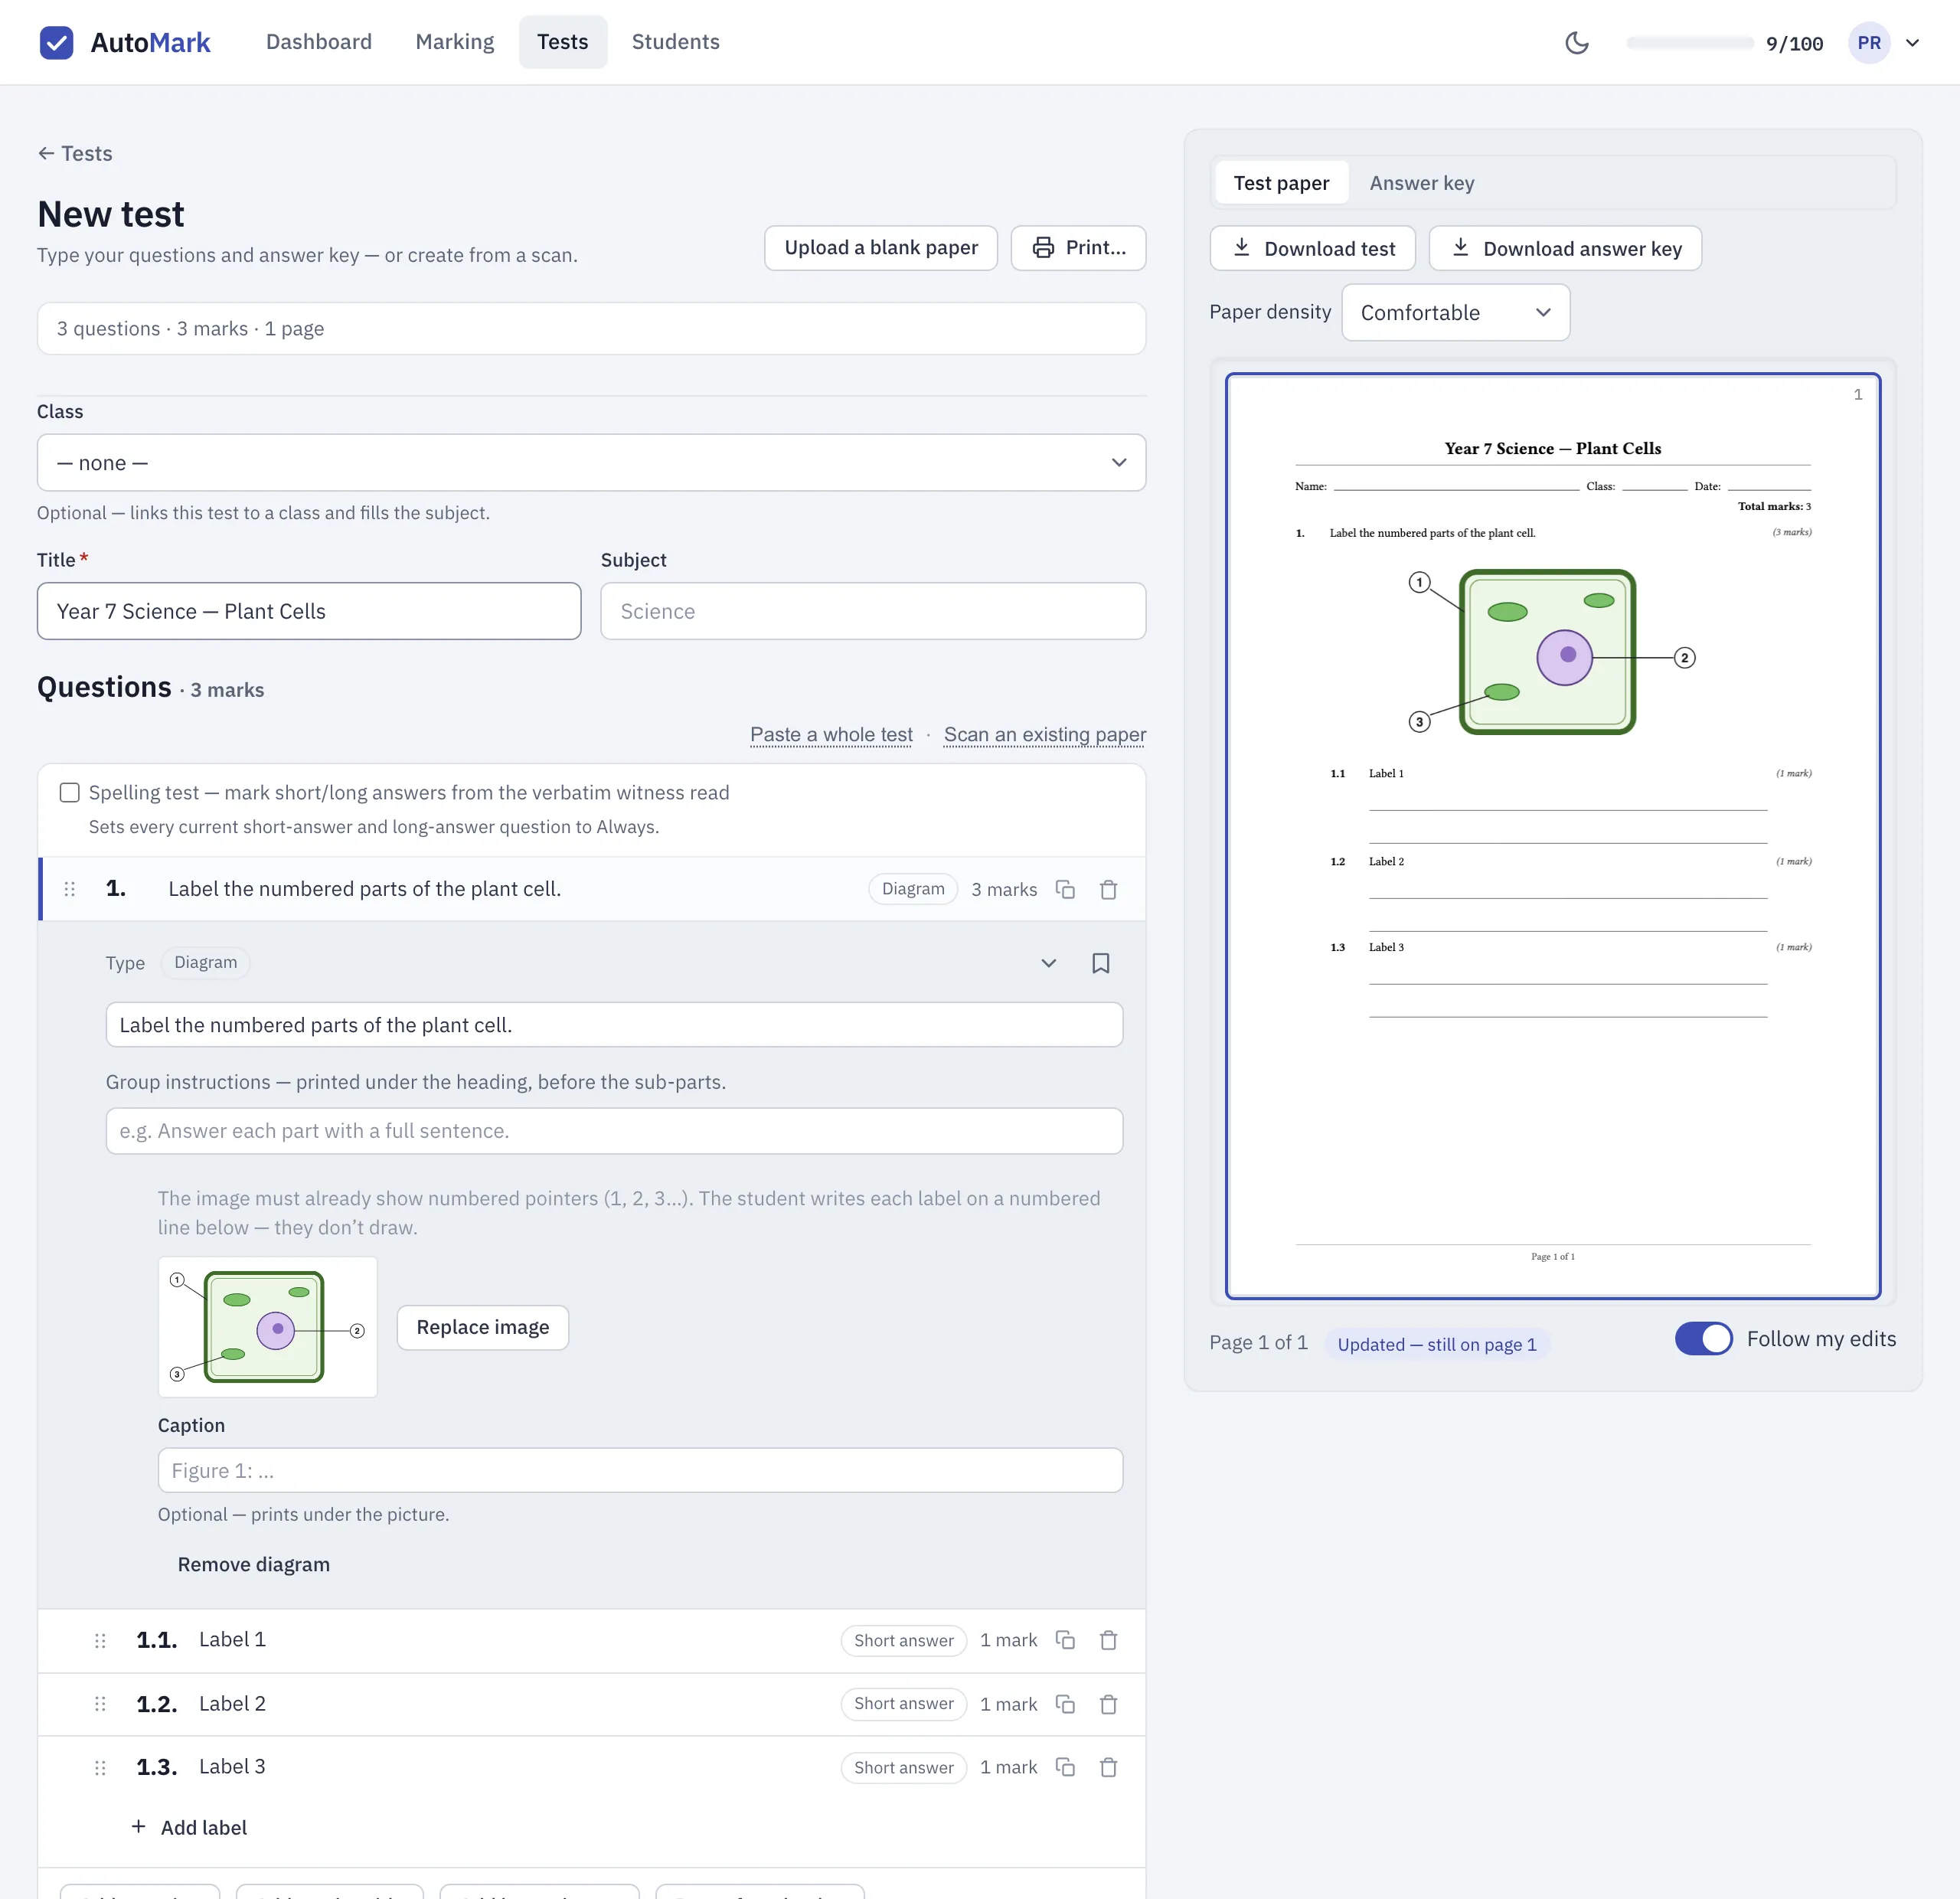
Under the picture you can also:
- Replace image to swap the picture and keep your labels;
- add a Caption, which prints under the picture;
- Remove diagram to go back to an ordinary question. This removes the picture and all its labels.
On the printed paper
Section titled “On the printed paper”The picture prints inside the question, with the caption under it. The labels follow as numbered lines. For question 1 these are 1.1, 1.2, 1.3, and so on. The answer key lists the expected answer for each label.
Check the print preview before you print. Make sure the number of lines matches the numbers on your picture, and that a student can tell which line goes with which part without asking you.
Marking and review
Section titled “Marking and review”Each label is marked against your answer for it, like any short written answer. Each label also gets its own result. A three-label diagram can bring up to three cards in the review queue, each with a crop of that student’s line from the scan.
AutoMarkHQ can tidy a misspelled handwritten word into the correctly spelled one when it reads it. On a labelling question that matters if spelling should cost a mark. The crop beside each reading shows what the student actually wrote, so go by the crop. If spelling is what you’re assessing, turn on Spelling counts in a label’s options when you set up the test. AutoMarkHQ then sends you any answer to that label whose spelling differs from your key. It doesn’t take marks off by itself; you decide.
As with every question, nothing is recorded against a student until you commit the run.
Drawing tasks
Section titled “Drawing tasks”If you want students to draw, shade or complete a diagram, use a long-answer question marked by hand instead. See question formats.