Arranging questions and the live preview
The test editor keeps every question on one short row, so a long test stays easy to scan, and shows the printed paper beside the list. You open one question at a time to edit it, move questions by dragging them, and watch the paper change as you type. Nothing changes the saved test until you choose Save changes (or Create test for a new one).
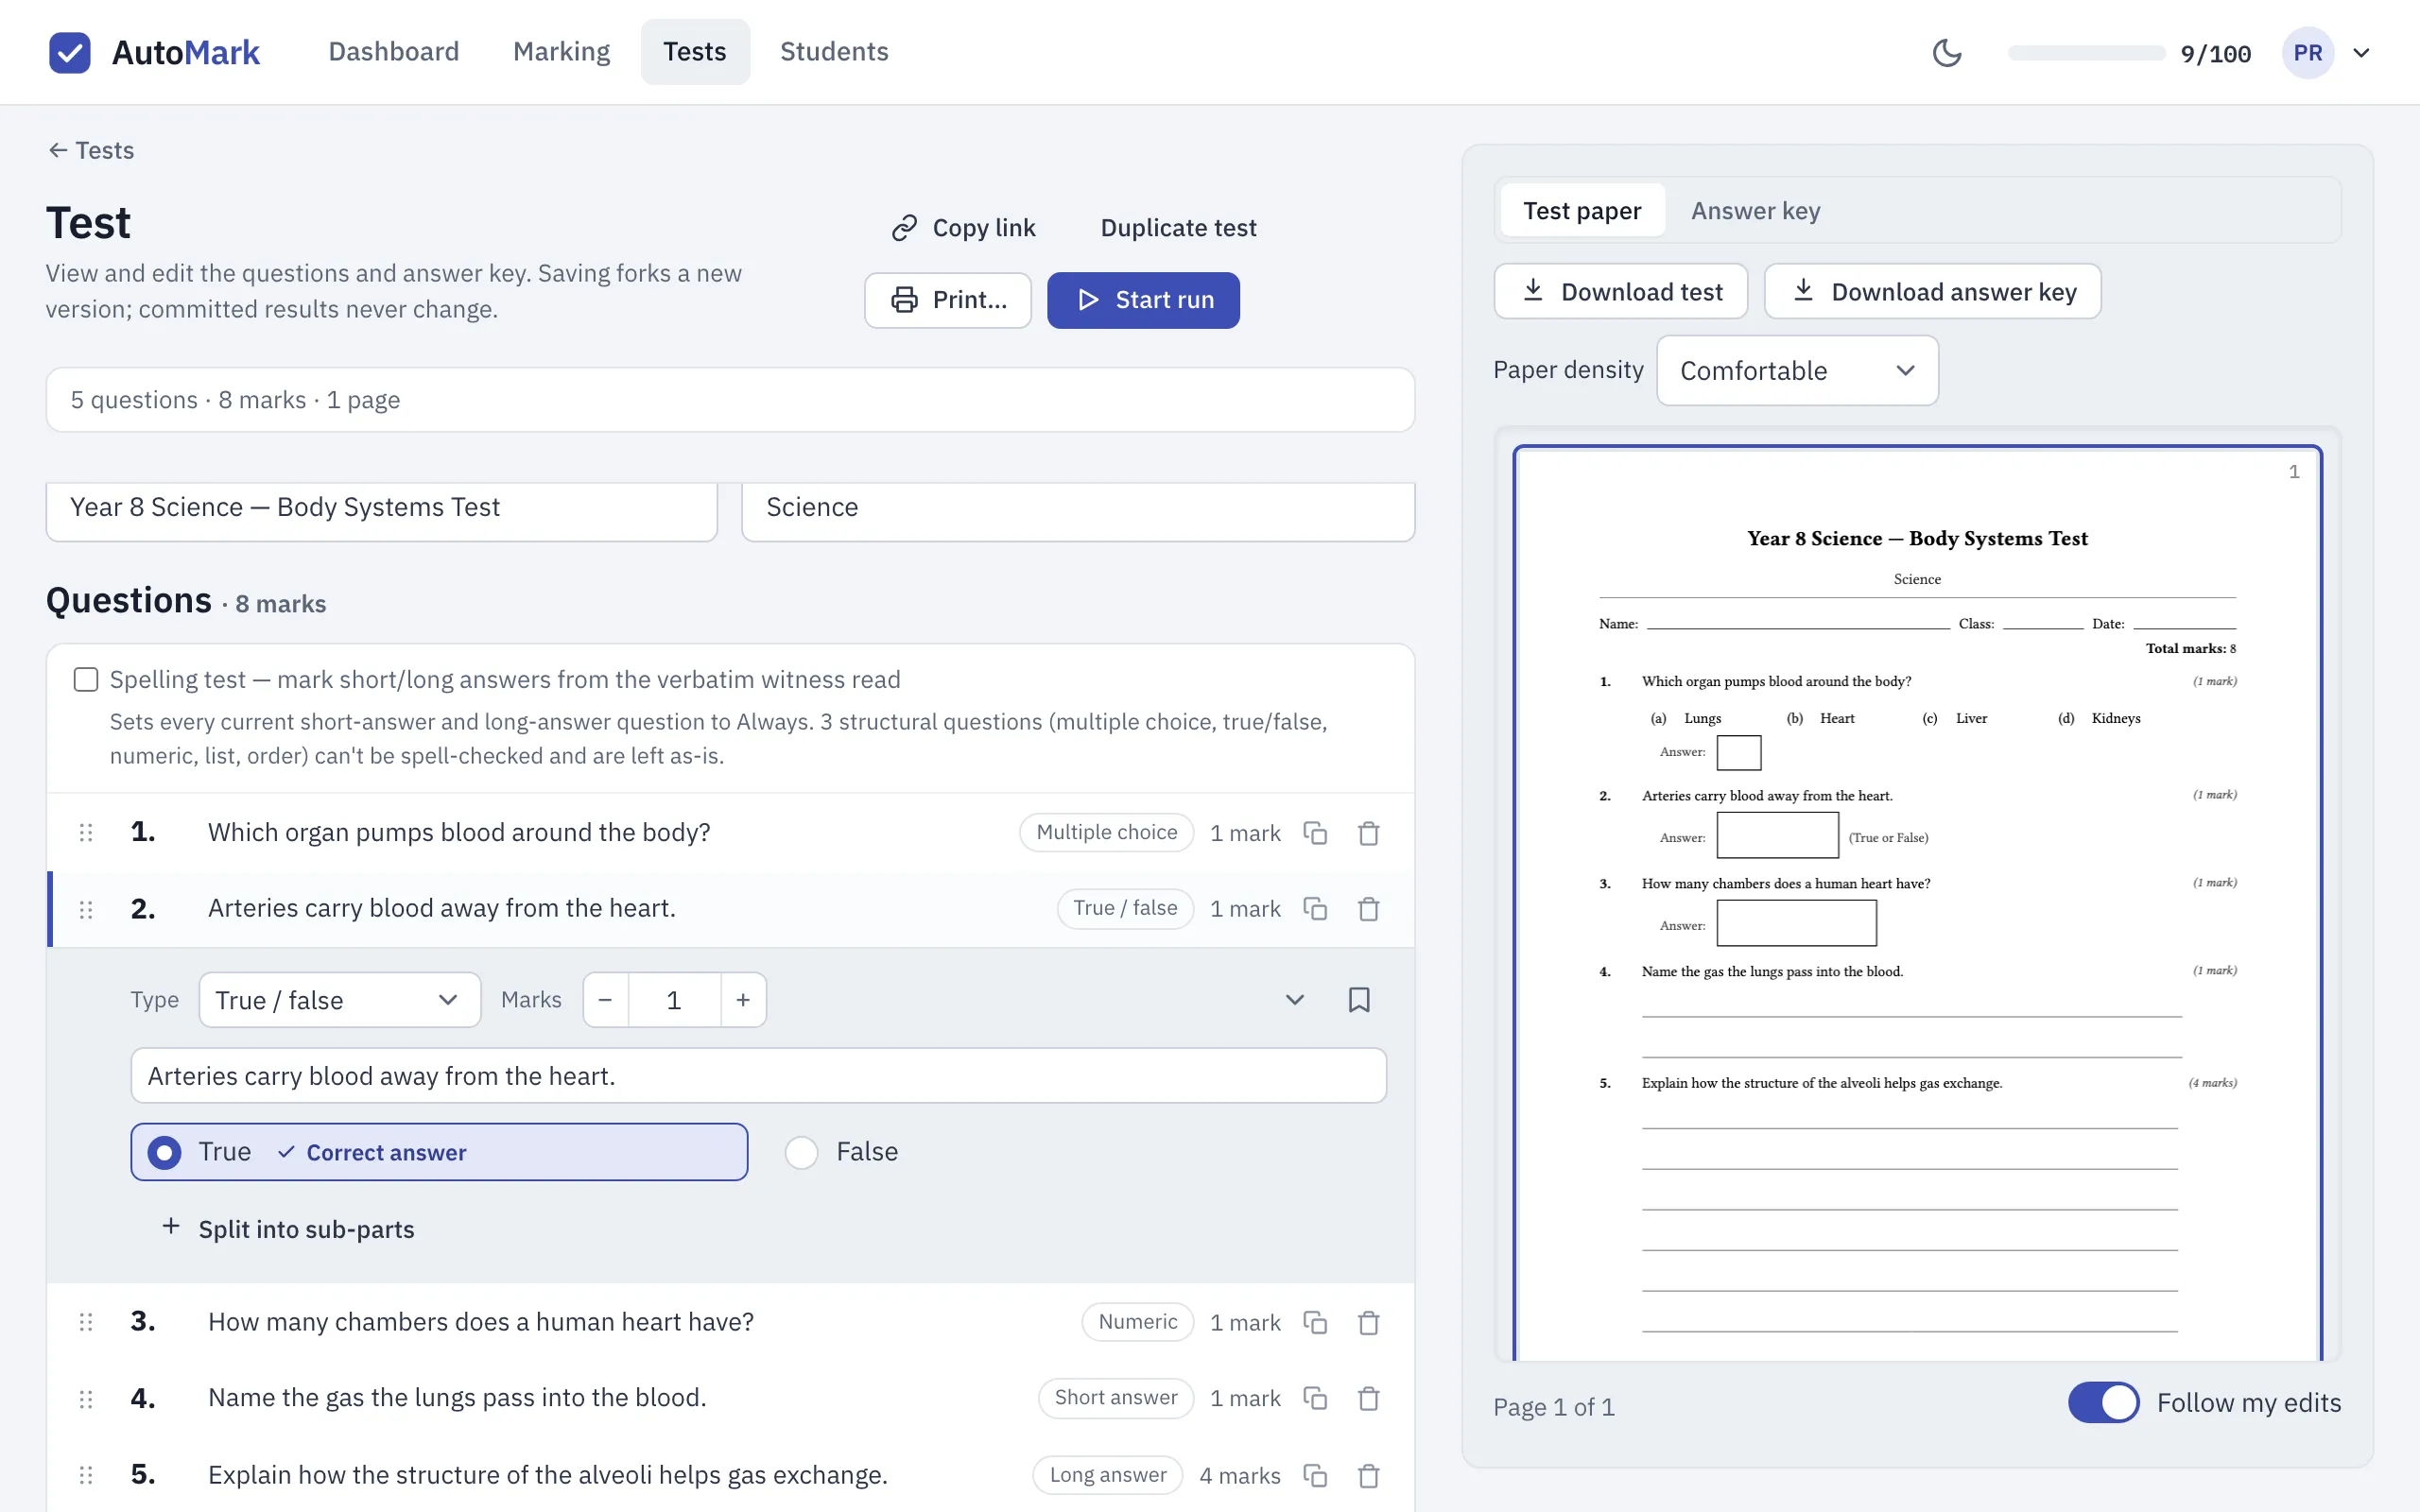
One row per question
Section titled “One row per question”Each row shows the question’s number, its prompt, its type and what it’s worth. Click a row to open it: the type, the marks, the prompt and the answer key appear underneath. Click the row again to close it, or click another row to move on. A question you’ve added or duplicated opens by itself, ready to type into.
The two icons at the end of each row duplicate the question (the copy lands straight below it) or remove it.
Changing the order
Section titled “Changing the order”Drag a question by the dotted grip on the left of its row and drop it where you want it. The numbering follows, on the row list and on the paper.
From the keyboard, select a row and press Alt+↑ or Alt+↓ (Option on a Mac) to move it
one place at a time. A question with parts moves as one, and its parts can be reordered within
it but not moved out to another question.
If you’ve already printed versions of the test and you move a question across a section title, the editor tells you those printed copies will be replaced, because the paper’s numbering has changed. Print again before you hand the paper out.
Removing a question
Section titled “Removing a question”Removing always asks first, and says what will happen: the question comes off the paper and the answer key, and later questions renumber.
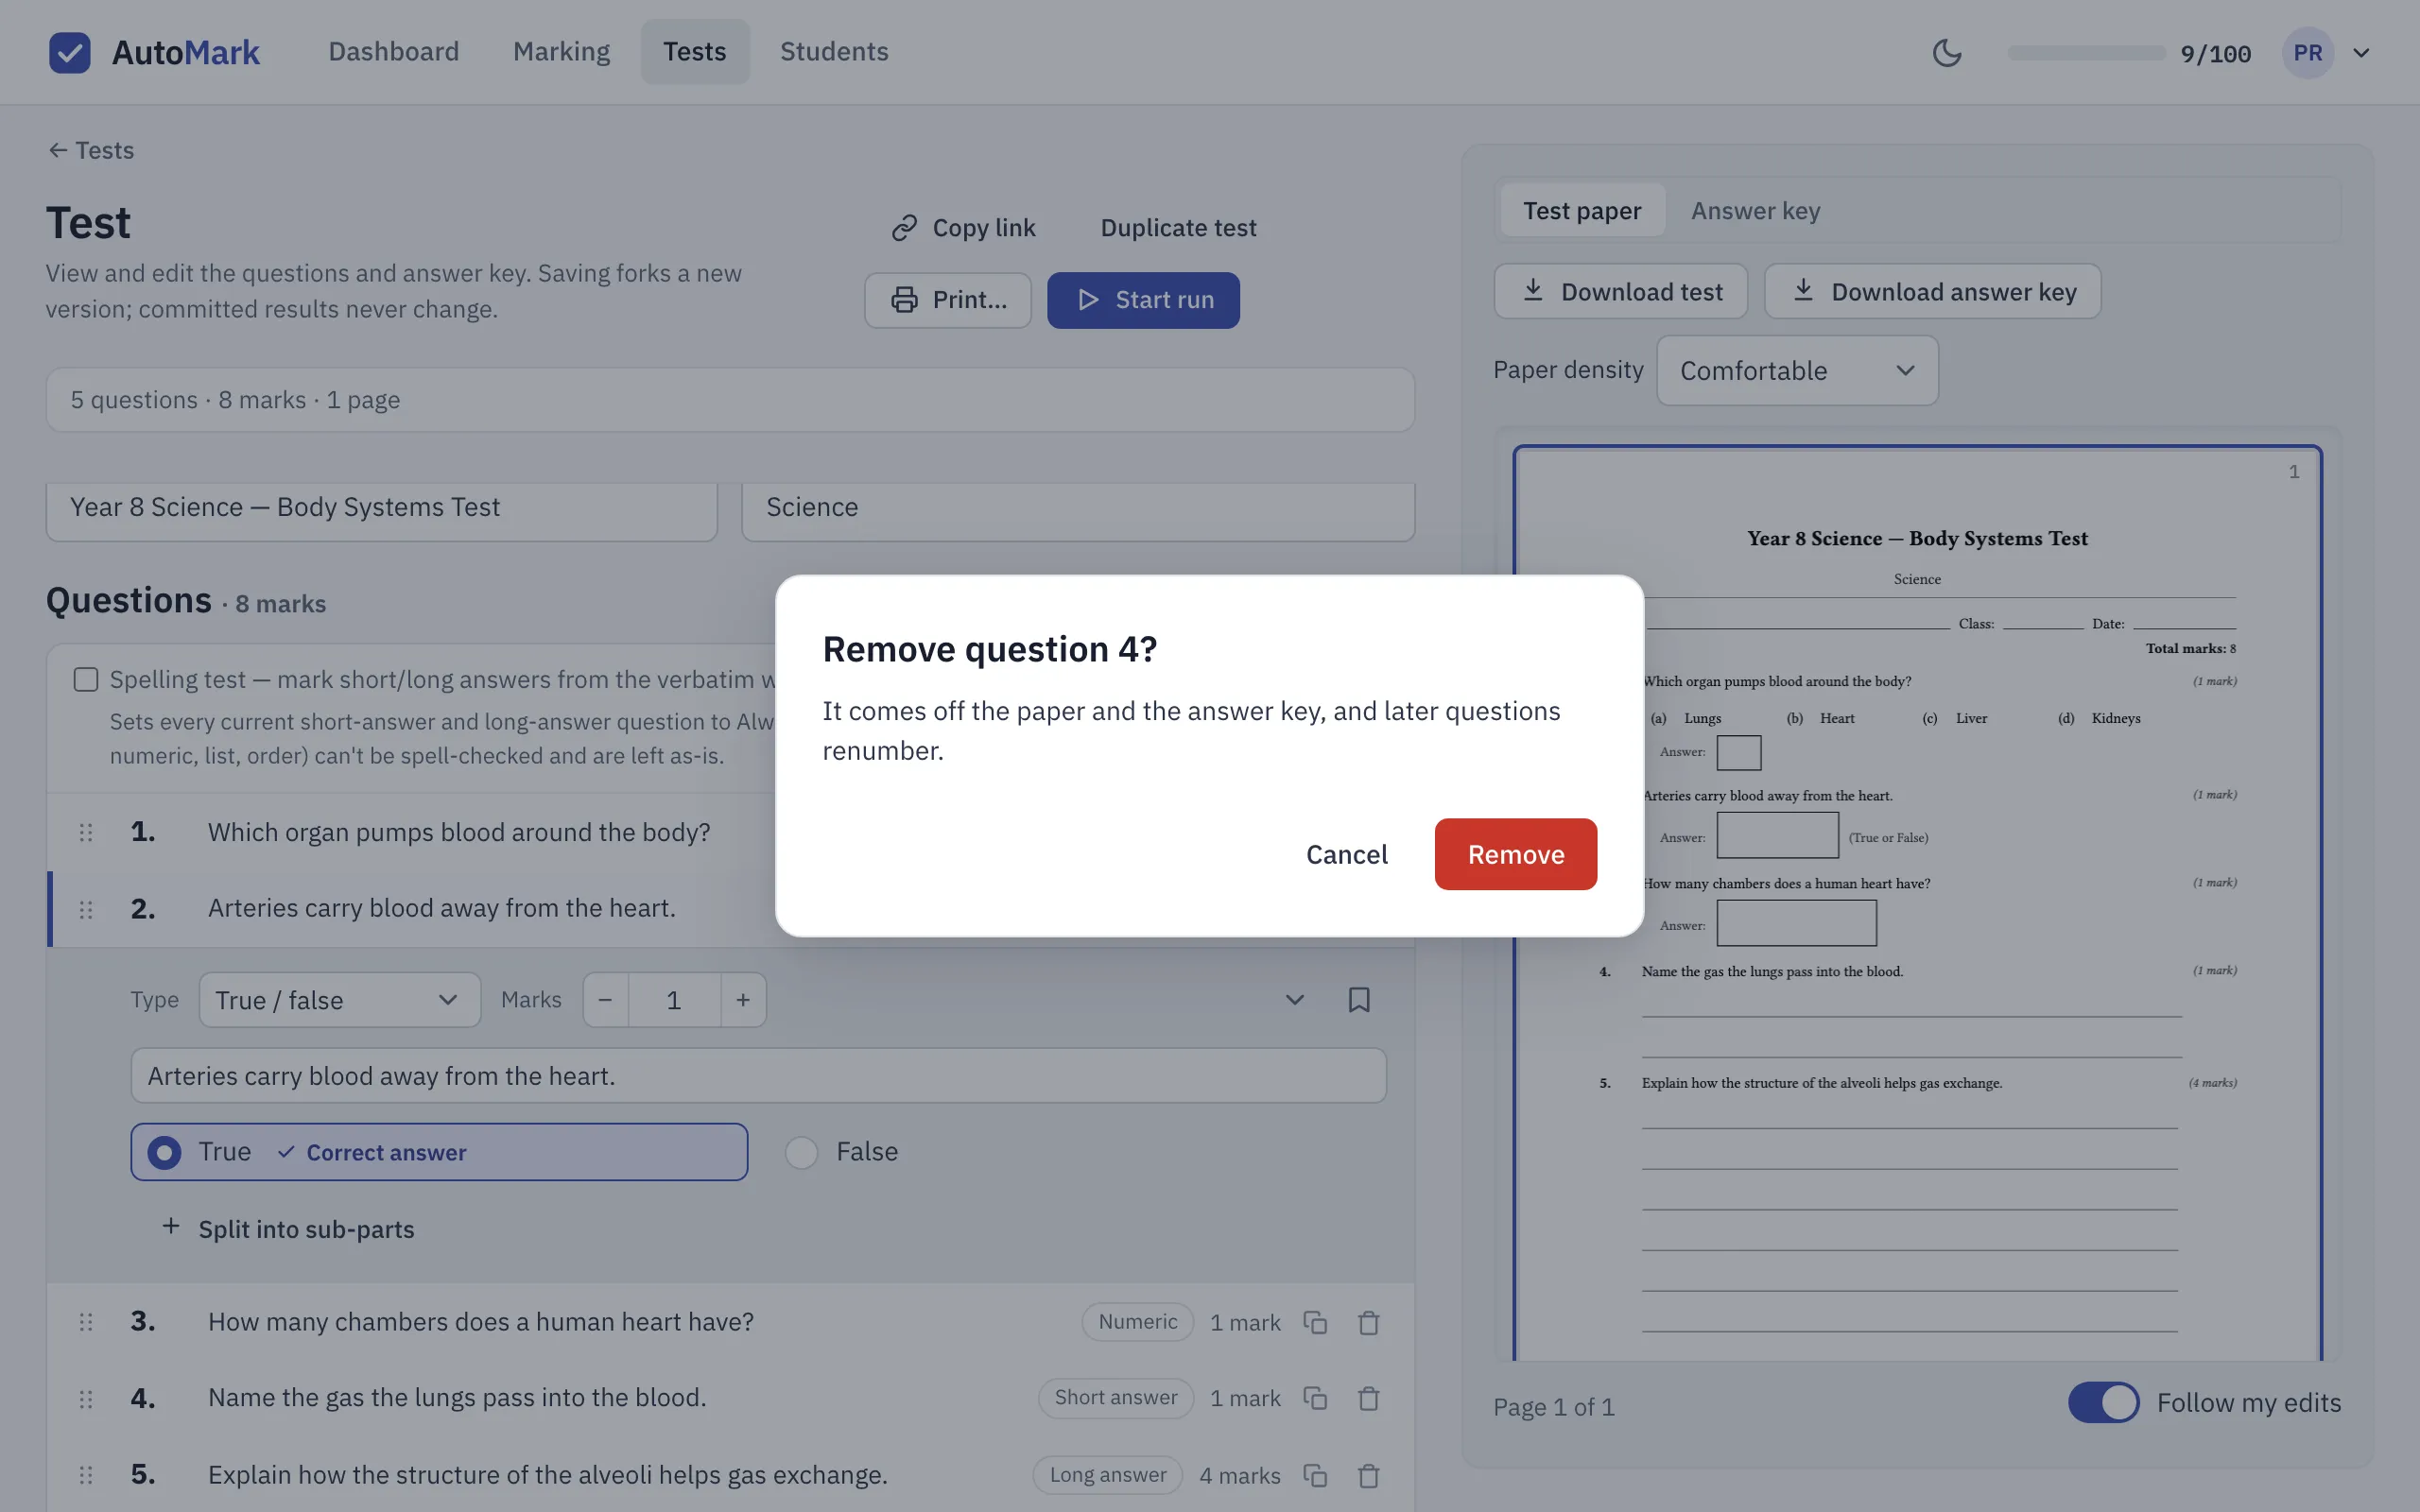
Straight after you remove a question, an Undo button appears at the bottom of the list for a few seconds and puts it back exactly where it was.
Keyboard shortcuts
Section titled “Keyboard shortcuts”The shortcuts are listed under the question list, so you don’t need to memorise them:
Shift+Enter— add a new question below the selected one, of the same typeCtrl+Enter(Cmd+Enteron a Mac) — add a part to the current questionAlt+↑/Alt+↓— move the selected questionDelete— remove the selected question (it still asks first)
Delete only acts on a selected row. While you’re typing in a field it deletes text, as usual,
and never the question.
The live preview
Section titled “The live preview”The preview beside the editor is the paper as it will print. It redraws a moment after you stop typing and stays on the page you were looking at; a short note below it confirms the page it kept.
- Test paper / Answer key switches between the student’s paper and your answer key, so you can check both before you print. The key is clearly marked as the teacher’s copy.
- Follow my edits (on by default) scrolls the preview to the page the question you’re editing prints on, and outlines that page. Turn it off if you’d rather the preview stayed where you left it; AutoMarkHQ remembers the choice in your browser.
- Download test and Download answer key give you the same papers as a PDF.
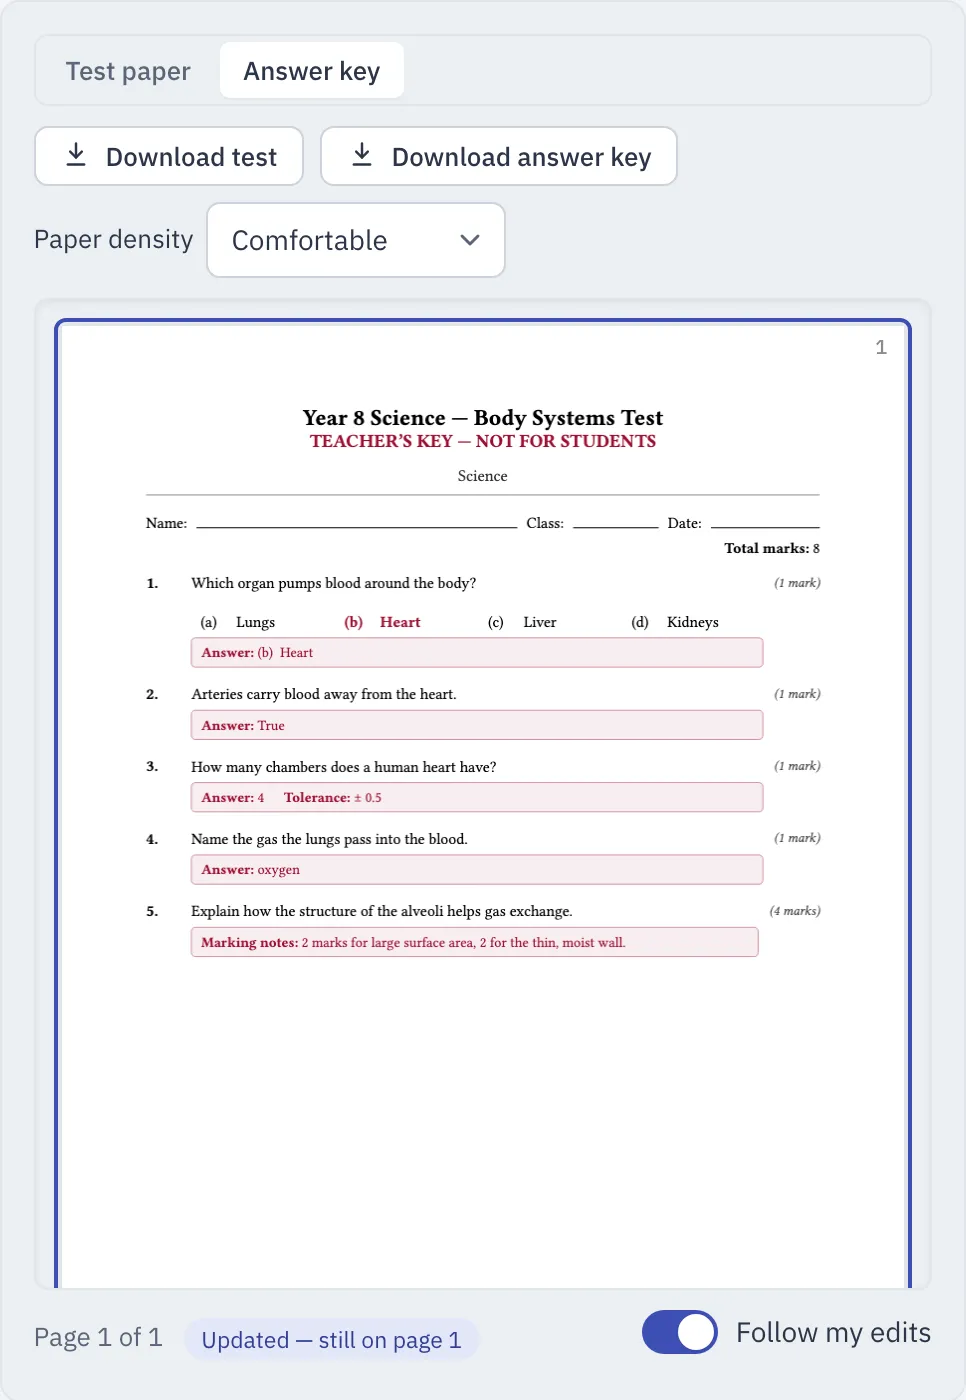
If one question can’t be printed as written, the preview pauses and names the question to fix; it picks up again once it’s fixed. If the preview can’t redraw for a moment, your questions are safe and it tries again on your next edit.
When your changes take effect
Section titled “When your changes take effect”Reordering, adding and removing questions change only the editor until you choose Save changes (or Create test for a new one). Saving keeps your earlier version of the test, so results you’ve already recorded aren’t changed by your edit, and a marking run that’s already under way keeps the version it started with. Your new order applies to papers you print and runs you start from then on.
For writing the questions themselves, see Authoring tests; for printing and alternate versions, see Printing and versions.